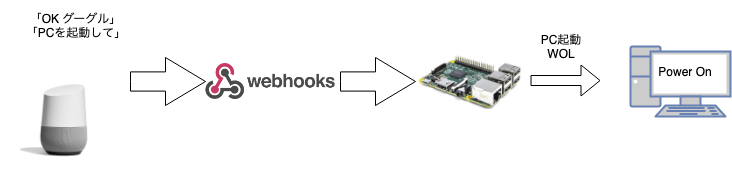
Use Case(ユースケース)
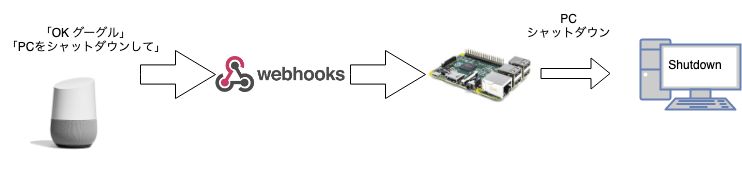
Google音声コマンド経由でPCのシャットダウンを行います。
前提条件
- (Raspberry Piの)PHPが動作するWEBサーバがセットアップされている
- (Raspberry Piの)WEBサーバの公開設定が終わっている
- DNSで名前解決ができる、固定IPやダイナミックDNSを利用 SynologyでValueDomain向けのDDNS設定方法
- ルーターのNAT / Port Foward / Virtual Serverの設定が出来ており、インタネットからWEBサーバにアクセスできる API連携プラットフォーム
- (Raspberry Piの)https経由(SSL証明書)が設定済み
- (Raspberry Piの)WEBサーバよりSSH2が利用可能 Raspberry Pi 3 B +にPHPのSSH2インストール
- IFTTTサービスの利用登録が実施済みである
- IFTTTサービスにおいて、Webhooksが利用可能である IFTTT(イフト)でWebhooksの利用
- 起動対象のPCにSSHサーバがインストールされている必要があります Raspberry Pi 3 B +にPHPのSSH2インストール
全体の流れ
- IFTTTのGoogle AssistantよりPCシャットダウン時の音声コマンドをトリガートリガー登録
- IFTTTのWebhooksでPCシャットダウン時の音声コマンド受領時のアクションを実行(Raspberry PiのWEB APIへ発信)
- WEB APIよりPCをシャットダウン(SSH2経由でシャットコマンドを実行)
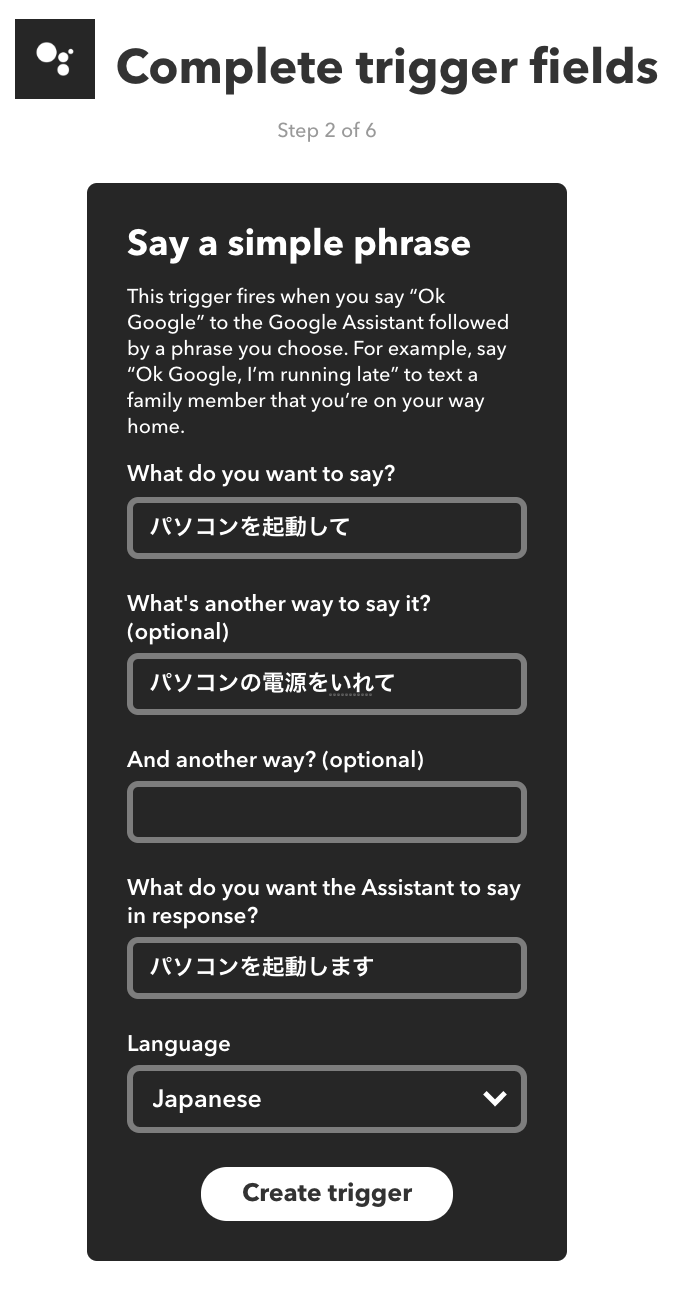
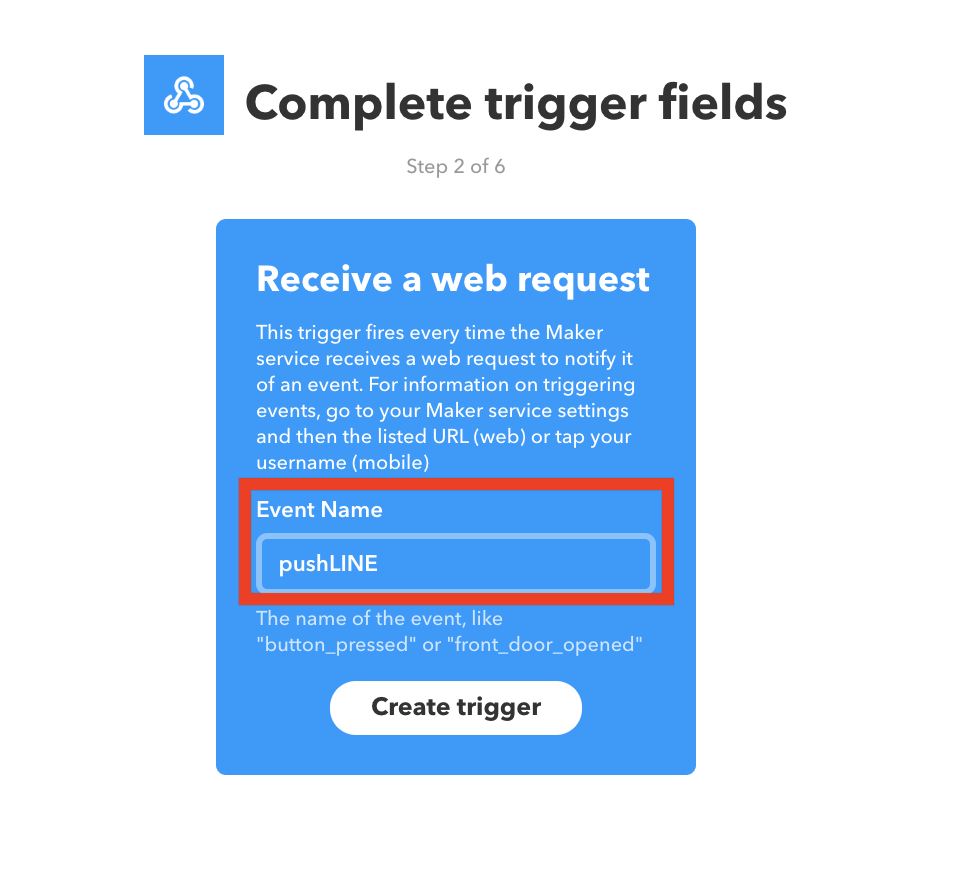
トリガー
![]()
![]()
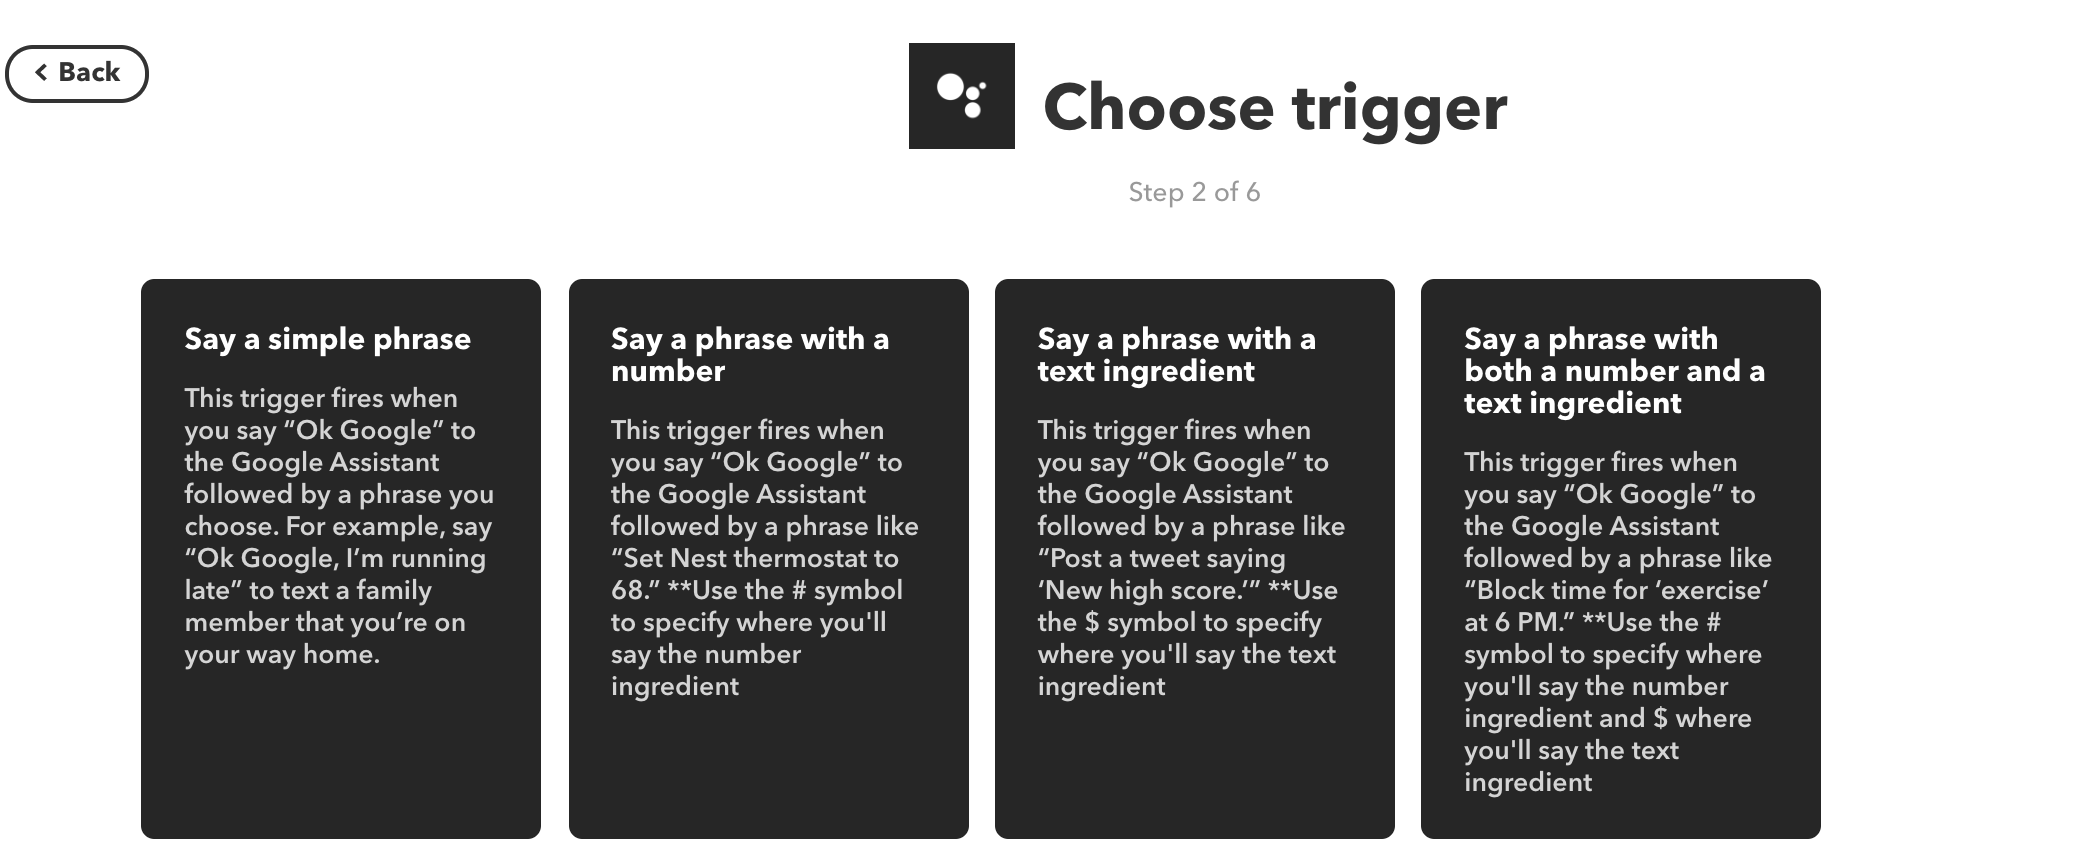
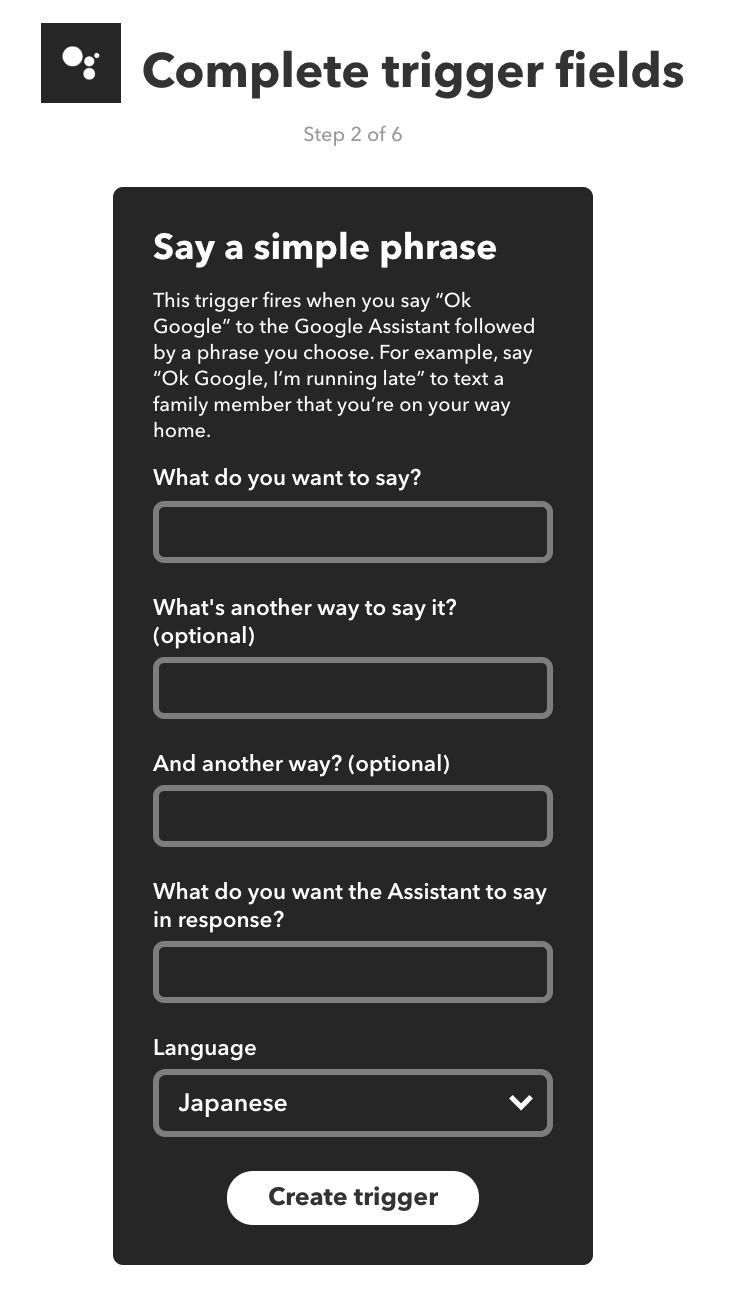
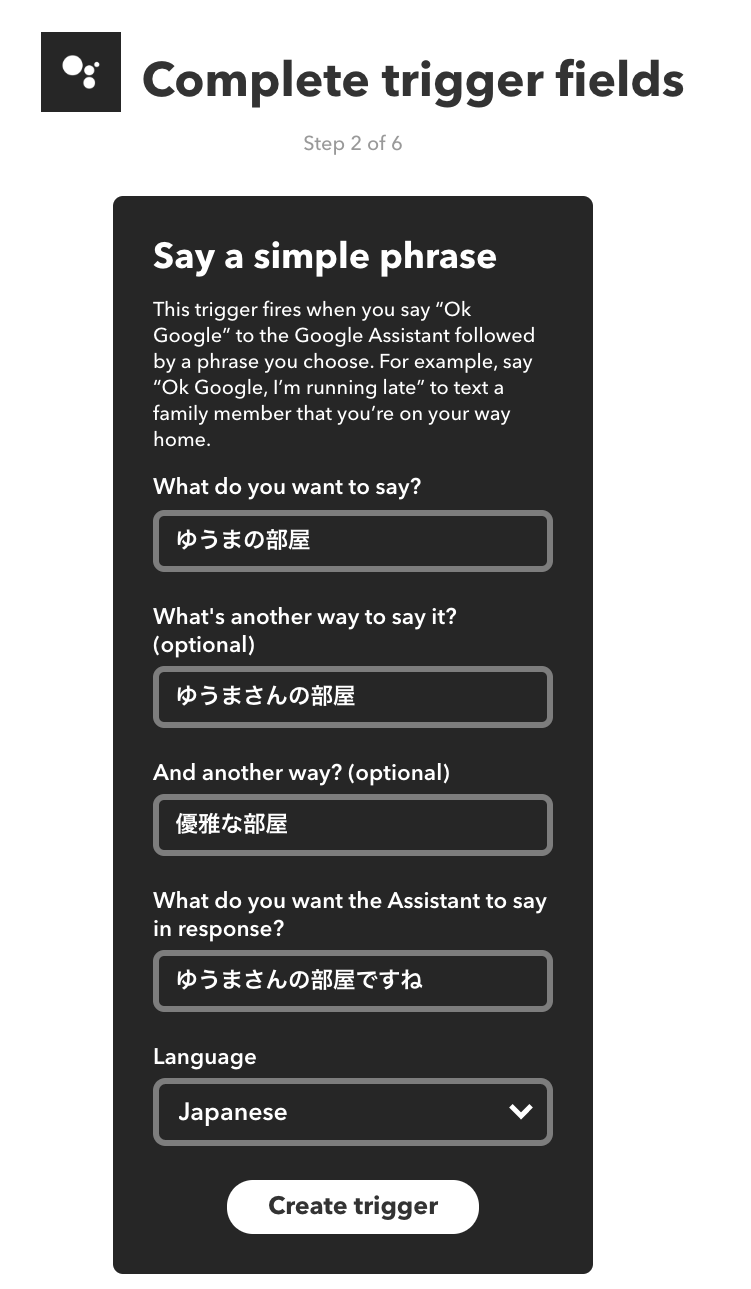
トリガー(this)にGoogle Assistantを選択し「Say a simple phrase」のトリガーを選択します。
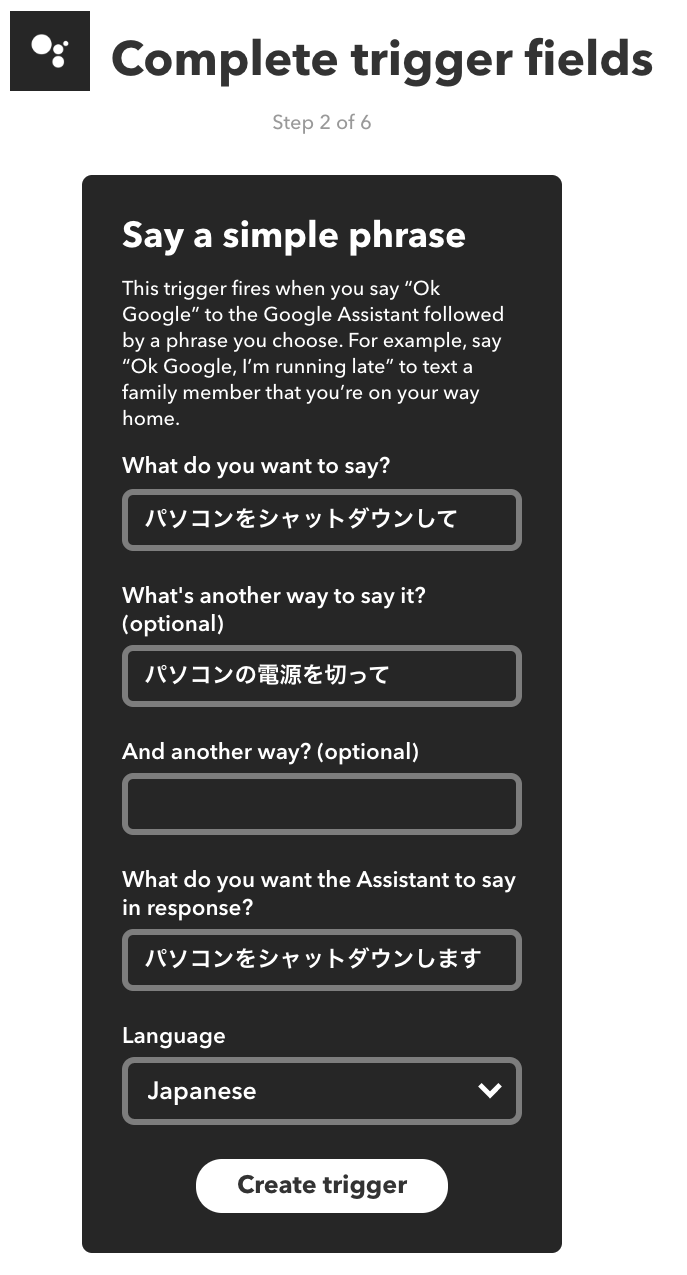 音声コマンドを登録します。
「パソコンをシャットダウンして」
「パソコンの電源を切って」などを登録します。
コマンド受付時のGoogle Homeからのレスポンスも登録します。
「パソコンをシャットダウンします」
Lanuguage(言語)は、Japanese(日本語)を選択します。
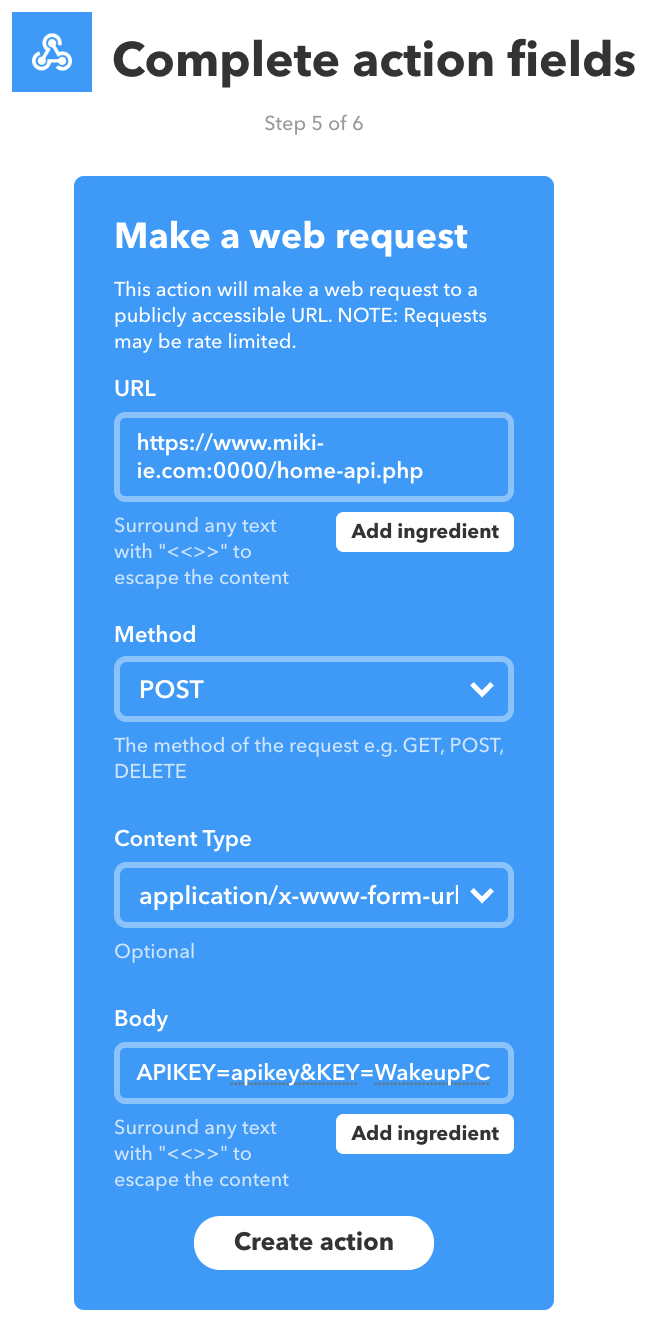
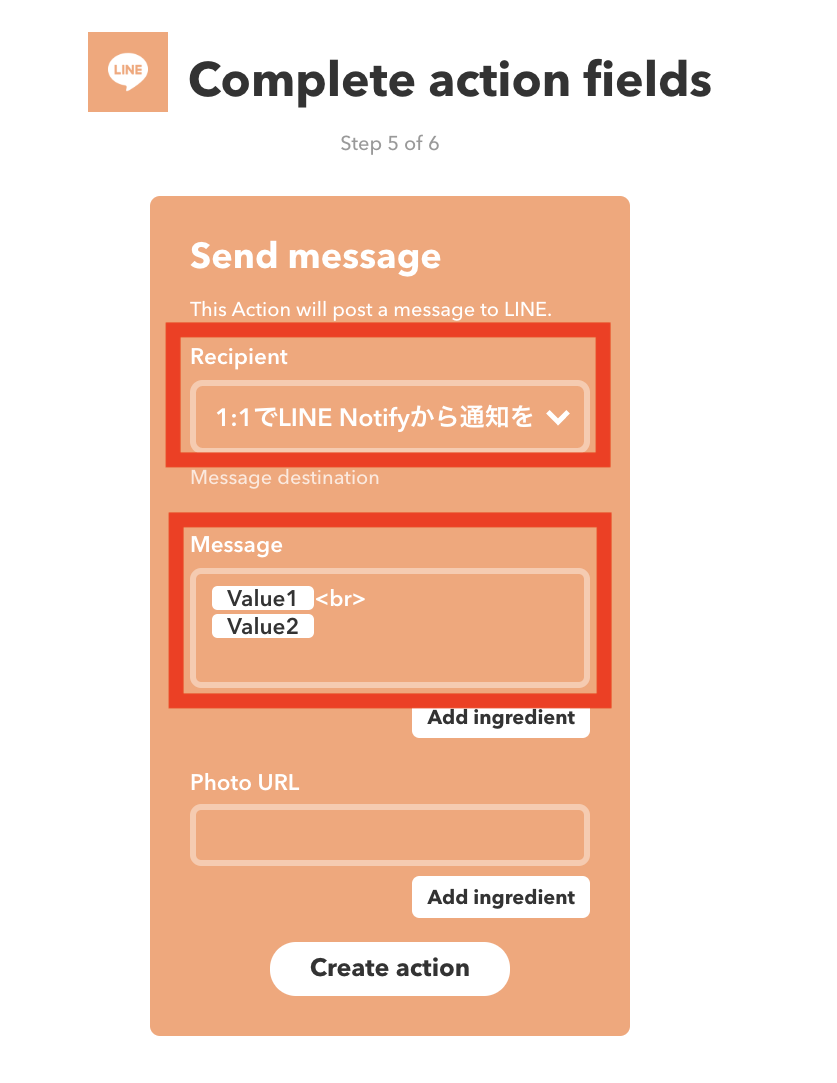
アクション
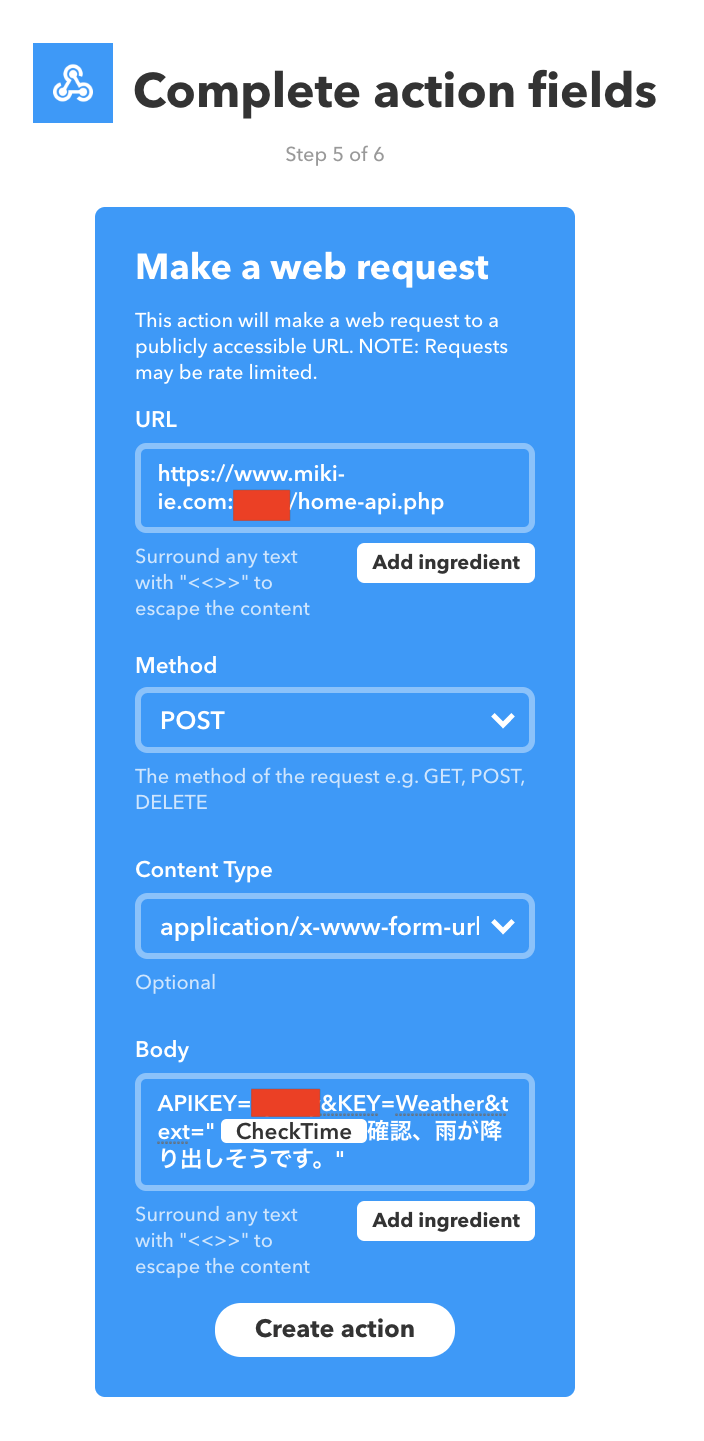
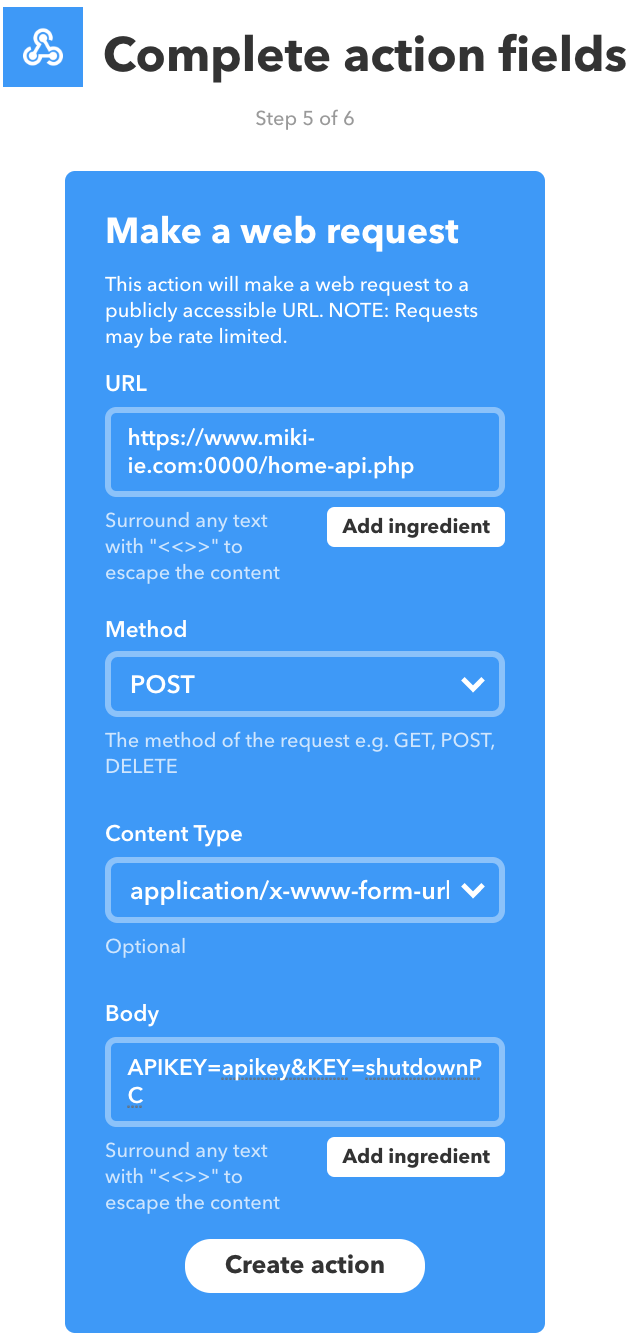
IFTTTのWebhooksよりRaspberry PiのWEB APIへPUSH通知
- URL:準備したAPIのURLを指定します。外部からWEBアクセス可能なURLを指定する必要があります。また、APIトークンを送信するので、https:// での指定を強くオススメします。
- Method:今回は、POST受信に対応したPHPを用いるので、POSTを指定します。
- Content Type:
application/x-www-form-urlencoded: キーと値は、その間に'='がある形でキーと値の組になり、'&'で区切られてエンコードされます。キーや値の英数字以外の文字は、パーセントエンコーディングされます。 - Body:準備したPHPの仕様に合わせて、3つのパラメータを設定します。
- APIKEY=apikey
- KEY=shutdownPC
APIKEY=apikey&KEY=shutdownPC
以下が、準備したサンプルのPHPスクリプトとなります。
//@HOME_API_LOG_NAME@ ログファイル名、書き込み権限が必要です
//@HOME_API_KEY@ POST受信時の簡易的なAPI-KEYのトークン確認を行います
//@WINDOWS_IP@ WindowsのIPアドレス
//@WINDOWS_USER@ Windowsのユーザー名
//@WINDOWS_PASS@ Windowsのパスワード

//各種設定
//ログのファイル名
define("HOME_API_LOG_NAME","@HOME_API_LOG_NAME@");
//home-api-key
define("HOME_API_KEY","@HOME_API_KEY@");
//Windows PC
define("WINDOWS_IP","@WINDOWS_IP@");
define("WINDOWS_USER","@WINDOWS_USER@");
define("WINDOWS_PASS","@WINDOWS_PASS@");

function shutdownPC($target_ip, $target_user, $target_pass) {
	logger("Start shutdown target_ip:".$target_ip." target_user:".$target_user,"INFO");
	$shutdown_time = 60;
	$comment = "シャットダウン開始します。キャンセル「-a」";
	$cmd = 'shutdown /s /f /t '.$shutdown_time.' /c '.$comment;
	$connection = ssh2_connect($target_ip);
	ssh2_auth_password($connection, $target_user, $target_pass);
    $stream = ssh2_exec($connection, $cmd);
    $errorstream = ssh2_fetch_stream($stream, SSH2_STREAM_STDERR);
    stream_set_blocking($stream, true);
    stream_set_blocking($errorstream, true);
    $ok =  stream_get_contents($stream);
   $ng =  stream_get_contents($errorstream); //エラーがあれば表示
   echo $ok;
   echo $ng;
}

function logger($text, $level) {
	$datetime = date('Y-m-d H:i:s');
	$date = date('Ym');
	$file_name = __DIR__ . "/log/log-home-{$date}.log";
	$text = "{$datetime} [{$level}] {$text}" . PHP_EOL;
	echo $text;
	if(!(file_exists($file_name))){
		touch($file_name);
		chmod($file_name, 0777);
	}
	return error_log(print_r($text, TRUE), 3, $file_name);
}

logger("Start API KEY=".$_POST['KEY'],"INFO");

if(isset($_POST['KEY']) && strcmp($_POST['APIKEY'], HOME_API_KEY) == 0) {
	switch ($_POST['KEY']) {
	case 'shutdownPC':
		logger("Start shutdownPC","INFO");
		shutdownPC(WINDOWS_IP, WINDOWS_USER, WINDOWS_PASS);
		break;
	default:
		logger("This is private API. (in Default)","ERROR");
	}
}else{
	logger("This is private API. (in else)","ERROR");
}
アクション
準備したPHPファイルより「@WINDOWS_IP@:WindowsのIPアドレス、 @WINDOWS_USER@:Windowsのユーザー名、@WINDOWS_PASS@:Windowsのパスワード 」に設定したPCへSSH2用いてPCへログインし、シャットダウンコマンドを実行します。