#
# The person who gets all mail for userids < 1000
# Make this empty to disable rewriting.
root=postmaster
# The place where the mail goes. The actual machine name is required no
# MX records are consulted. Commonly mailhosts are named mail.domain.com
#mailhub=mail
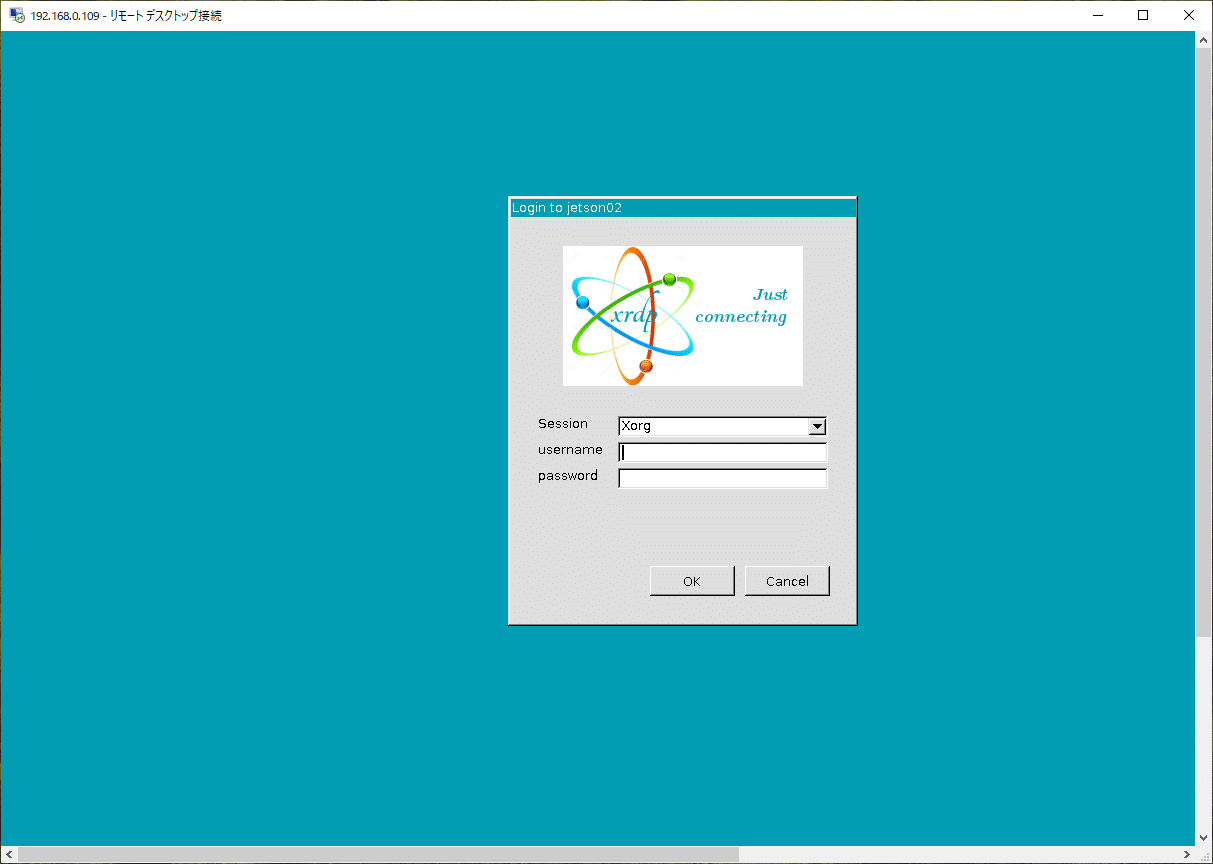
mailhub=@@mail_server@@
# Where will the mail seem to come from?
#rewriteDomain=
rewriteDomain=miki-ie.com
# The full hostname
#hostname=jetson01
hostname=jetson01.miki-ie.com
# Are users allowed to set their own From: address?
# YES - Allow the user to specify their own From: address
# NO - Use the system generated From: address
#FromLineOverride=YES
FromLineOverride=YES
// Automatically upgrade packages from these (origin:archive) pairs
//
// Note that in Ubuntu security updates may pull in new dependencies
// from non-security sources (e.g. chromium). By allowing the release
// pocket these get automatically pulled in.
Unattended-Upgrade::Allowed-Origins {
        "${distro_id}:${distro_codename}";
        "${distro_id}:${distro_codename}-security";
        // Extended Security Maintenance; doesn't necessarily exist for
        // every release and this system may not have it installed, but if
        // available, the policy for updates is such that unattended-upgrades
        // should also install from here by default.
        "${distro_id}ESMApps:${distro_codename}-apps-security";
        "${distro_id}ESM:${distro_codename}-infra-security";
//      "${distro_id}:${distro_codename}-updates";
//      "${distro_id}:${distro_codename}-proposed";
//      "${distro_id}:${distro_codename}-backports";
};

// List of packages to not update (regexp are supported)
Unattended-Upgrade::Package-Blacklist {
//      "vim";
//      "libc6";
//      "libc6-dev";
//      "libc6-i686";
};

// This option will controls whether the development release of Ubuntu will be
// upgraded automatically.
Unattended-Upgrade::DevRelease "false";

// This option allows you to control if on a unclean dpkg exit
// unattended-upgrades will automatically run
//   dpkg --force-confold --configure -a
// The default is true, to ensure updates keep getting installed
//Unattended-Upgrade::AutoFixInterruptedDpkg "false";

// Split the upgrade into the smallest possible chunks so that
// they can be interrupted with SIGTERM. This makes the upgrade
// a bit slower but it has the benefit that shutdown while a upgrade
// is running is possible (with a small delay)
//Unattended-Upgrade::MinimalSteps "false";

// Install all unattended-upgrades when the machine is shutting down
// instead of doing it in the background while the machine is running
// This will (obviously) make shutdown slower
//Unattended-Upgrade::InstallOnShutdown "true";

// Send email to this address for problems or packages upgrades
// If empty or unset then no email is sent, make sure that you
// have a working mail setup on your system. A package that provides
// 'mailx' must be installed. E.g. "user@example.com"
//Unattended-Upgrade::Mail "root";
Unattended-Upgrade::Mail "aaa@bbb.com";

// Set this value to "true" to get emails only on errors. Default
// is to always send a mail if Unattended-Upgrade::Mail is set
//Unattended-Upgrade::MailOnlyOnError "true";
Unattended-Upgrade::MailOnlyOnError "true";

// Remove unused automatically installed kernel-related packages
// (kernel images, kernel headers and kernel version locked tools).
//Unattended-Upgrade::Remove-Unused-Kernel-Packages "false";
Unattended-Upgrade::Remove-Unused-Kernel-Packages "true";

// Do automatic removal of new unused dependencies after the upgrade
// (equivalent to apt-get autoremove)
//Unattended-Upgrade::Remove-Unused-Dependencies "false";
Unattended-Upgrade::Remove-Unused-Dependencies "true";

// Automatically reboot *WITHOUT CONFIRMATION*
//  if the file /var/run/reboot-required is found after the upgrade
//Unattended-Upgrade::Automatic-Reboot "false";
Unattended-Upgrade::Automatic-Reboot "true";

// If automatic reboot is enabled and needed, reboot at the specific
// time instead of immediately
//  Default: "now"
//Unattended-Upgrade::Automatic-Reboot-Time "02:00";
Unattended-Upgrade::Automatic-Reboot-Time "02:00";

// Use apt bandwidth limit feature, this example limits the download
// speed to 70kb/sec
//Acquire::http::Dl-Limit "70";

// Enable logging to syslog. Default is False
// Unattended-Upgrade::SyslogEnable "false";

// Specify syslog facility. Default is daemon
// Unattended-Upgrade::SyslogFacility "daemon";

// Download and install upgrades only on AC power
// (i.e. skip or gracefully stop updates on battery)
// Unattended-Upgrade::OnlyOnACPower "true";

// Download and install upgrades only on non-metered connection
// (i.e. skip or gracefully stop updates on a metered connection)
// Unattended-Upgrade::Skip-Updates-On-Metered-Connections "true";
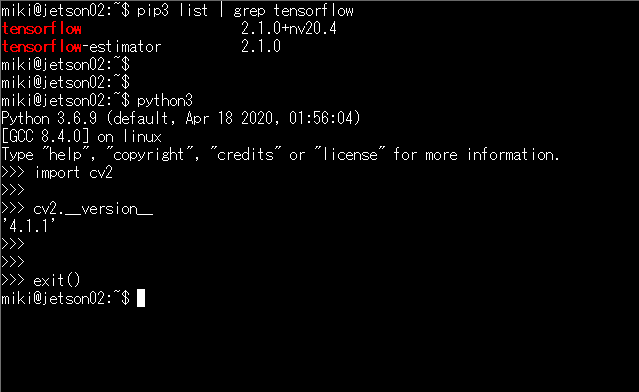
Led by dlib’s Davis King, and implemented by Yashas Samaga, OpenCV 4.2 now supports NVIDIA GPUs for inference using OpenCV’s dnn module, improving inference speed by up to 1549%!
$ sudo su jenkins
$ cd /home/jenkins/
$ mkdir .ssh
jenkins@jetson02:~$ ssh-keygen -t rsa
Generating public/private rsa key pair.
Enter file in which to save the key (/home/jenkins/.ssh/id_rsa):
Enter passphrase (empty for no passphrase):
Enter same passphrase again:
Your identification has been saved in /home/jenkins/.ssh/id_rsa.
Your public key has been saved in /home/jenkins/.ssh/id_rsa.pub.
The key fingerprint is:
SHA256:
The key's randomart image is:
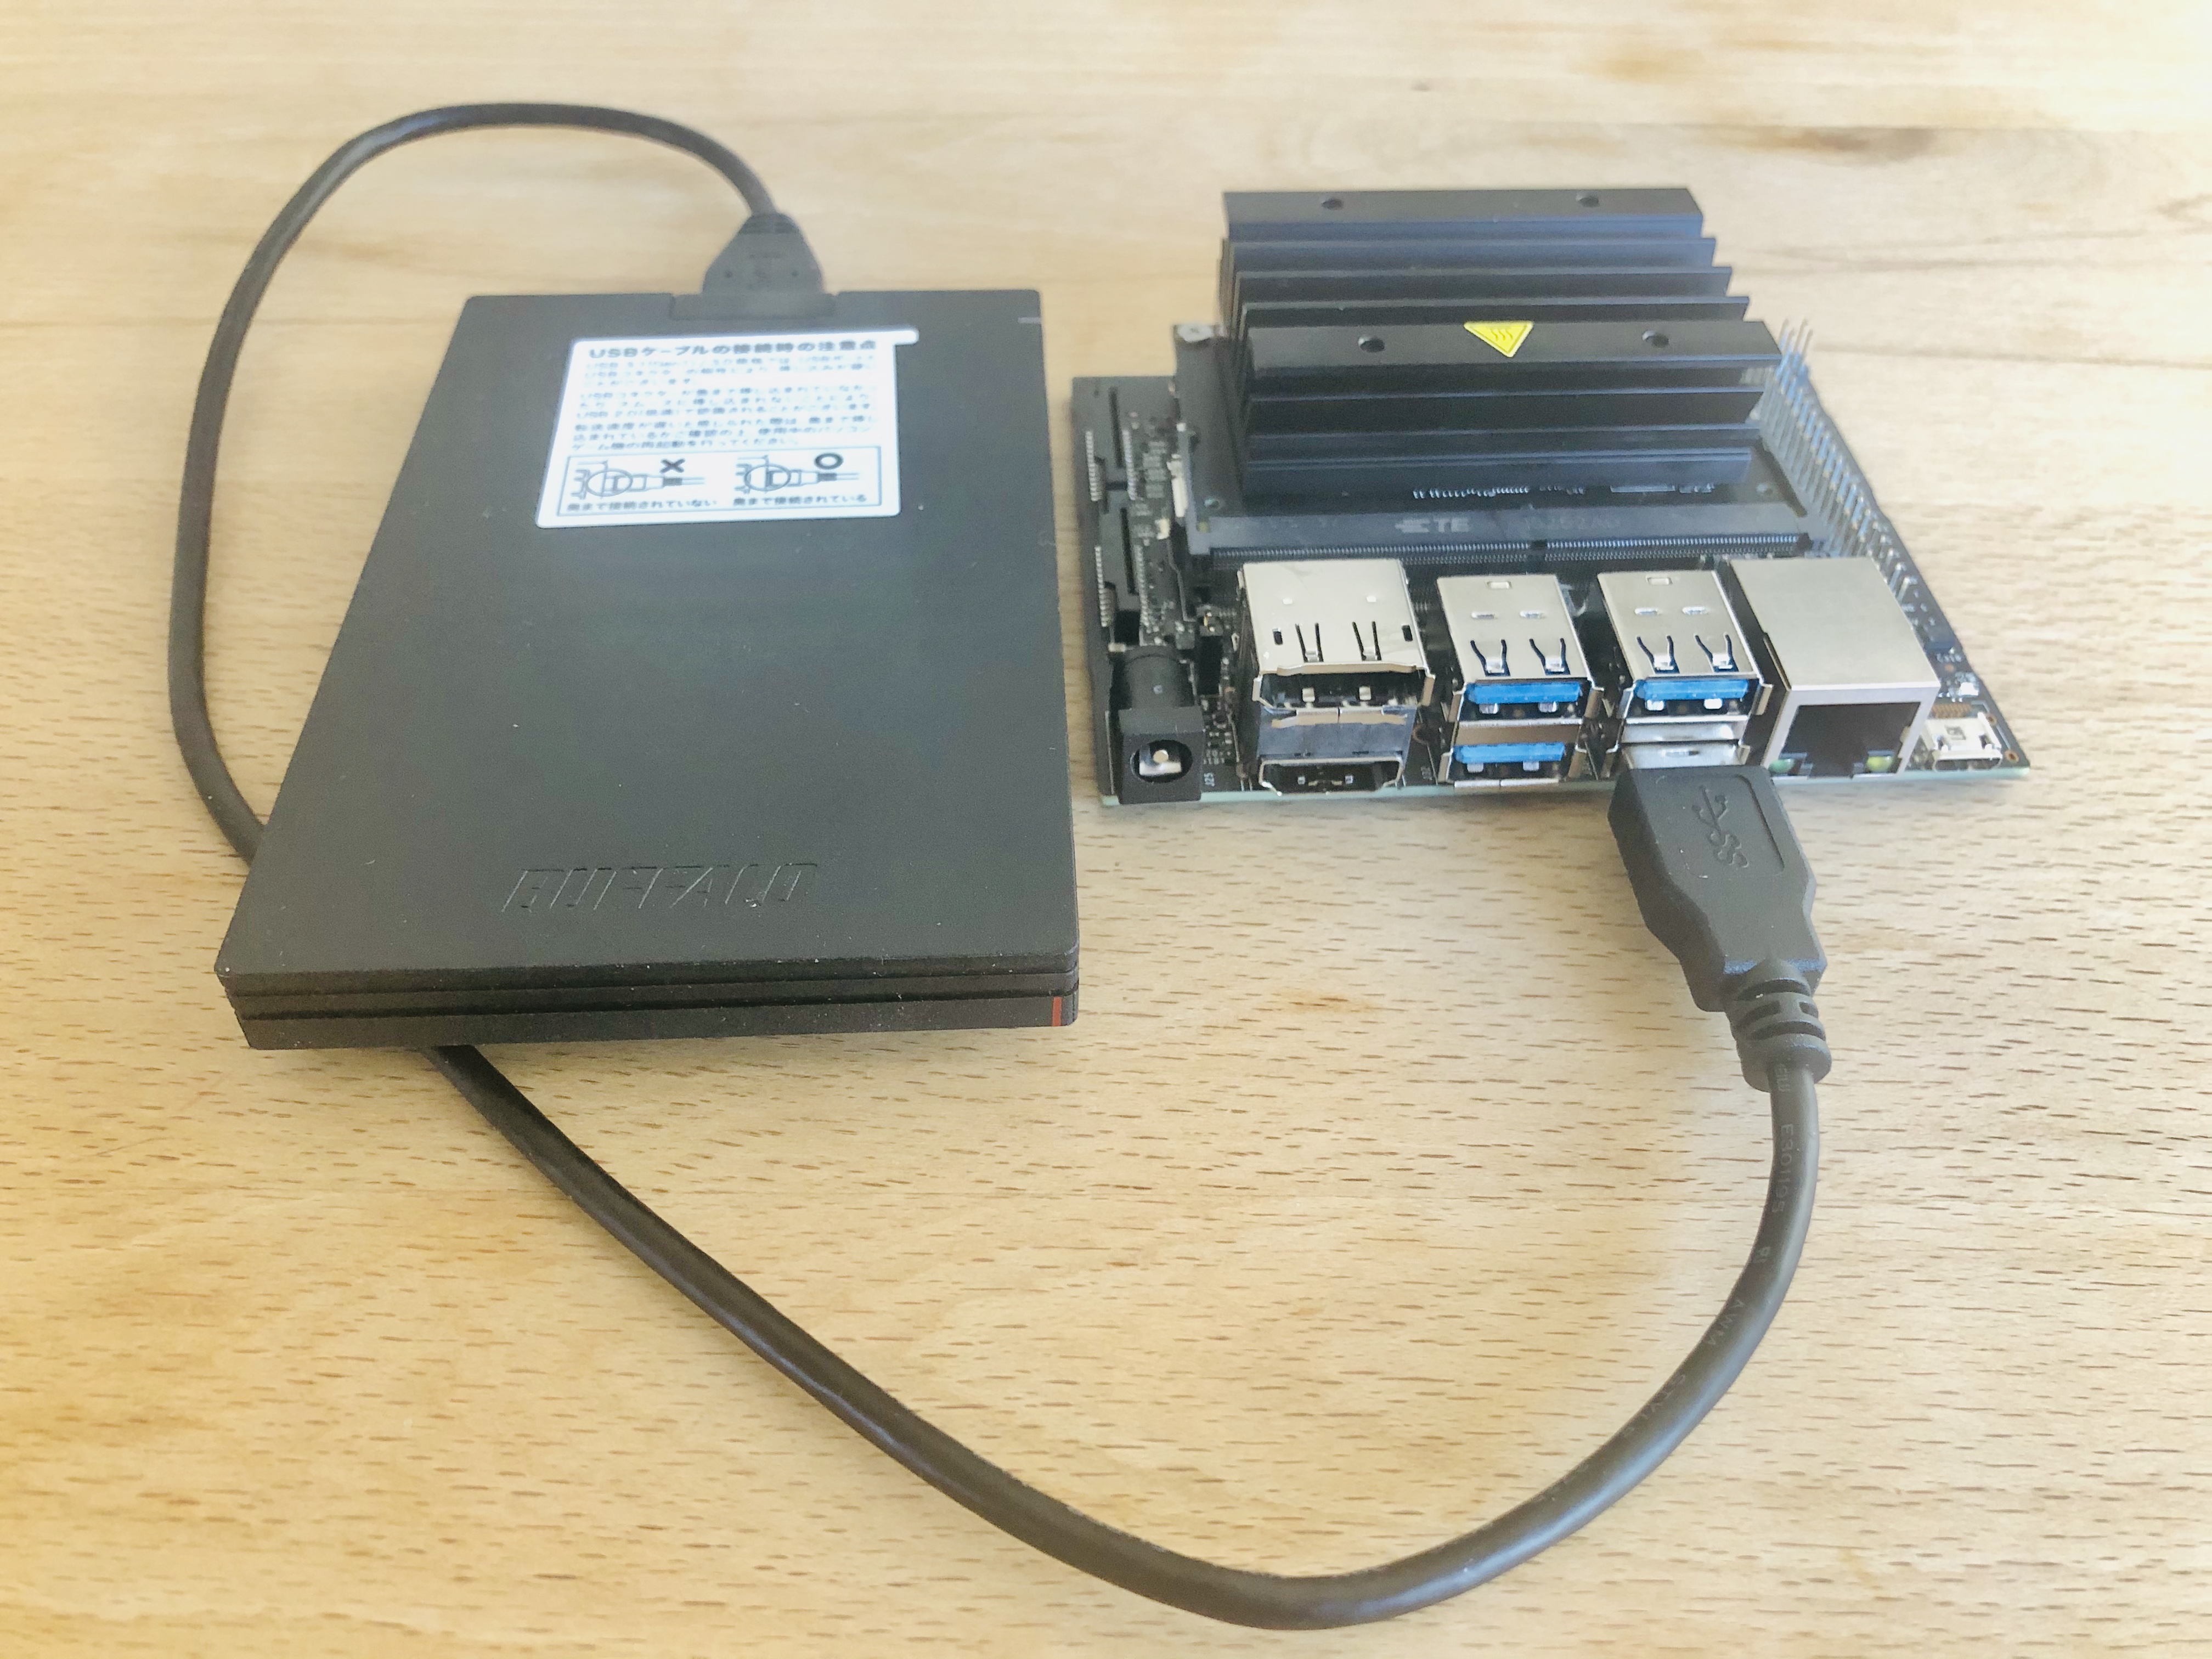
$ git clone https://github.com/JetsonHacksNano/rootOnUSB
Cloning into 'rootOnUSB'...
remote: Enumerating objects: 87, done.
remote: Total 87 (delta 0), reused 0 (delta 0), pack-reused 87
Unpacking objects: 100% (87/87), done.
$ cd rootOnUSB/
$ ls
LICENSE    addUSBToInitramfs.sh  data         sample-extlinux.conf
README.md  copyRootToUSB.sh      diskUUID.sh  scripts
USB接続HDD/SSDにデータコピー
ブートシーケンスにUSB接続を追加するツールを実行します。
~/rootOnUSB$ ./addUSBToInitramfs.sh
Adding USB to initramfs
[sudo] password :
Warning: couldn't identify filesystem type for fsck hook, ignoring.
I: The initramfs will attempt to resume from /dev/zram3
I: (UUID=bfeedab2-3ada-4cb1-924c-bf1df42d9e3e)
I: Set the RESUME variable to override this.
/sbin/ldconfig.real: Warning: ignoring configuration file that cannot be opened: /etc/ld.so.conf.d/aarch64-linux-gnu_EGL.conf: No such file or directory
/sbin/ldconfig.real: Warning: ignoring configuration file that cannot be opened: /etc/ld.so.conf.d/aarch64-linux-gnu_GL.conf: No such file or directory
usage: ./copyRootToUSB.sh [OPTIONS]

  -d | --directory     Directory path to parent of kernel

  -v | --volume_label  Label of Volume to lookup

  -p | --path          Device Path to USB drive (e.g. /dev/sda1)

  -h | --help  This message