コンテンツへスキップ

PCをリモート起動するためにWOL導入

Wake On LAN とは、ネットワーク経由でパソコンの電源をオンにする機能のことです。よく、WOLと省略されます。

Wake on LANについては、パソコンのBIOS やWindowsの設定が必要で、Wake on LANに対応したパソコンやマザーボードが必要となります。
他のパソコンからの起動を命じる信号(Magic Packet)を、LAN経由で接続されたWake On LANに対応したネットワークアダプタを装着しているパソコンが受信するとこのMagic Packetを受信したほうのパソコンの電源がオンとなります。

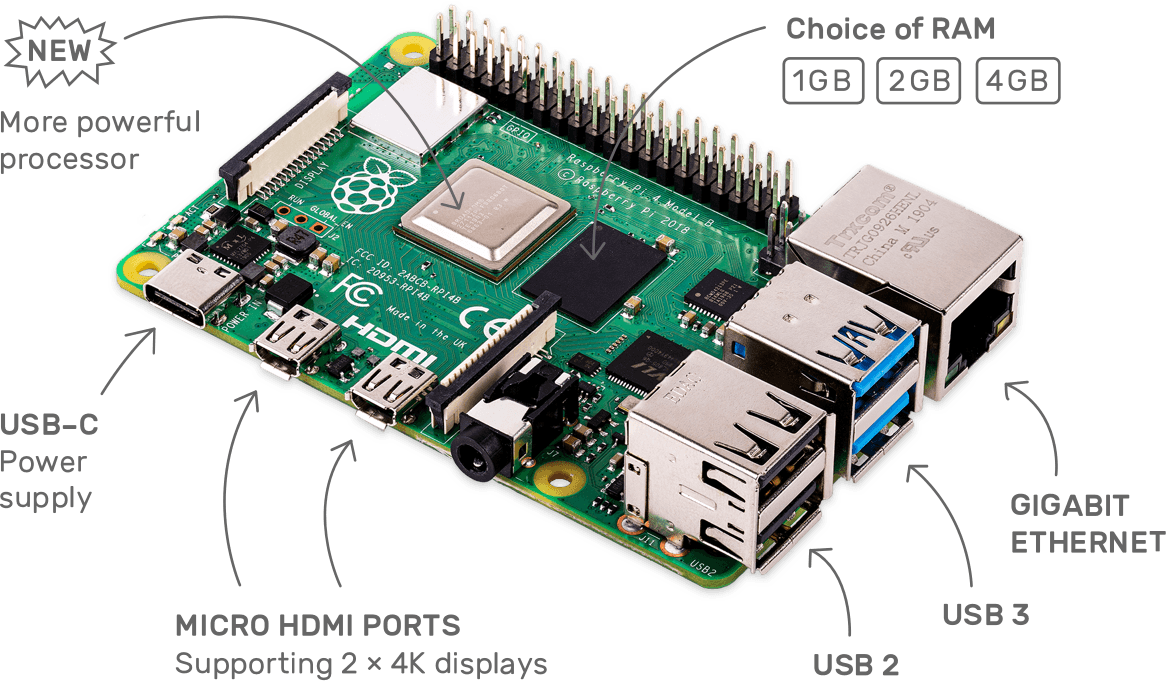
Raspberry PiよりMagic Packetを送信するために「etherwake」をインストール

以下のコマンドで「etherwake」をインストール

$ sudo apt-get update
$ sudo apt-get install etherwake
$ which etherwake
/usr/sbin/etherwake

以下、インストール時のコンソールです。

@raspberrypi:~ $ apt-cache search wake on lan
between - game about consciousness and isolation
crossroads - open source load balance and fail over utility for TCP based services
desktop-autoloader - Accelerate Diskless Workstation systems by pre-loading a dummy Desktop Session
etherwake - tool to send magic Wake-on-LAN packets
fusioninventory-for-glpi - FusionInventory Server embedded as a plugin into GLPI
golang-github-danwakefield-fnmatch-dev - Updated clone of kballard’s fnmatch(3) implementation for Go
gwakeonlan - wakes up your machines using Wake on LAN
shutdown-at-night - System to shut down clients at night, and wake them in the morning
wakeonlan - Sends 'magic packets' to wake-on-LAN enabled ethernet adapters
@raspberrypi:~ $ sudo apt-get update
@raspberrypi:~ $ sudo apt-get install etherwake

パッケージリストを読み込んでいます... 完了
依存関係ツリーを作成しています 
状態情報を読み取っています... 完了
以下の追加パッケージがインストールされます:
wakeonlan
以下のパッケージが新たにインストールされます:
etherwake wakeonlan
アップグレード: 0 個、新規インストール: 2 個、削除: 0 個、保留: 19 個。
19.6 kB のアーカイブを取得する必要があります。
この操作後に追加で 42.0 kB のディスク容量が消費されます。
続行しますか? [Y/n] y
取得:1 http://ftp.jaist.ac.jp/pub/Linux/raspbian-archive/raspbian buster/main armhf etherwake armhf 1.09-4 [9,112 B]
取得:2 http://ftp.jaist.ac.jp/pub/Linux/raspbian-archive/raspbian buster/main armhf wakeonlan all 0.41-12 [10.5 kB]
19.6 kB を 2秒 で取得しました (12.4 kB/s)
以前に未選択のパッケージ etherwake を選択しています。
(データベースを読み込んでいます ... 現在 145425 個のファイルとディレクトリがインストールされています。)
.../etherwake_1.09-4_armhf.deb を展開する準備をしています ...
etherwake (1.09-4) を展開しています...
以前に未選択のパッケージ wakeonlan を選択しています。
.../wakeonlan_0.41-12_all.deb を展開する準備をしています ...
wakeonlan (0.41-12) を展開しています...
wakeonlan (0.41-12) を設定しています ...
etherwake (1.09-4) を設定しています ...
man-db (2.8.5-2) のトリガを処理しています ...
@raspberrypi:~ $ which etherwake
/usr/sbin/etherwake
@raspberrypi:~ $ etherwake -u
usage: etherwake [-i <ifname>] [-p aa:bb:cc:dd[:ee:ff]] 00:11:22:33:44:55

PHPよりetherwakeコマンドを実行

参考URL:GoogleHome で PCを起動( IFTTT / Webhook / Wake-on-LAN)

PHPを実行するapacheユーザーからsudoパスワード無しに、etherwakeが実行可能となりように設定します。

$ sudo visudo

apache ALL=(ALL) NOPASSWD: /usr/sbin/etherwake
www-data ALL=(root) NOPASSWD: ALL

以下が、「etherwake」を実行する際のPHPソースコードとなります。
関数として準備し、引数でLANカードのMACアドレスを引数で渡すようにしております。

function powerOn($MAC) {
	$cmd = 'sudo /usr/sbin/etherwake '.$MAC;
	$output =  shell_exec($cmd);
}

//powerOn実行
powerON("xx:xx:xx:xx:xx:xx");


PHPのSSH2インストール

Raspberry Piで以下のSSH2を利用するスクリプトを実行した際に、エラーが出ました。
[Sat Jul 06 17:32:35.669744 2019] [php7:error] PHP Fatal error: Uncaught Error: Call to undefined function ssh2_connect() in /var/www/

Call to undefined function ssh2_connect()とあったので、「php-ssh2」をインストールすることで、PHPでSSH2を利用できます。

$connection = ssh2_connect($target_ip);
ssh2_auth_password($connection, $target_user, $target_pass);
$stream = ssh2_exec($connection, $cmd);
$errorstream = ssh2_fetch_stream($stream, SSH2_STREAM_STDERR);
stream_set_blocking($stream, true);
stream_set_blocking($errorstream, true);
以下、実際の操作ログです。
Apache経由で利用する際は、apacheの再起動を実施後、利用してください。
@raspberrypi:~ $ sudo apt-cache search libss
[sudo]スワード:
cl-plus-ssl - Common Lisp interface to OpenSSL
dcmtk - OFFIS DICOM toolkit command line utilities
dlang-openssl - D version of the C headers for openssl
lib32gcc-6-dev-amd64-cross - GCC support library (32 bit development files)
lib32gcc-6-dev-mips64el-cross - GCC support library (32 bit development files)
lib32gcc-6-dev-s390x-cross - GCC support library (32 bit development files)
lib32gcc-8-dev-amd64-cross - GCC support library (32 bit development files)
lib32gcc-8-dev-mips64-cross - GCC support library (32 bit development files)
lib32gcc-8-dev-mips64el-cross - GCC support library (32 bit development files)
lib32gcc-8-dev-mips64r6-cross - GCC support library (32 bit development files)
lib32gcc-8-dev-mips64r6el-cross - GCC support library (32 bit development files)
lib32gcc-8-dev-ppc64-cross - GCC support library (32 bit development files)
lib32gcc-8-dev-s390x-cross - GCC support library (32 bit development files)
lib32gcc-8-dev-sparc64-cross - GCC support library (32 bit development files)
lib32gcc-8-dev-x32-cross - GCC support library (32 bit development files)
lib64gcc-6-dev-i386-cross - GCC support library (64bit development files)
lib64gcc-6-dev-mips-cross - GCC support library (64bit development files)
lib64gcc-6-dev-mipsel-cross - GCC support library (64bit development files)
lib64gcc-8-dev-i386-cross - GCC support library (64bit development files)
lib64gcc-8-dev-mips-cross - GCC support library (64bit development files)
lib64gcc-8-dev-mipsel-cross - GCC support library (64bit development files)
lib64gcc-8-dev-mipsr6-cross - GCC support library (64bit development files)
lib64gcc-8-dev-mipsr6el-cross - GCC support library (64bit development files)
lib64gcc-8-dev-powerpc-cross - GCC support library (64bit development files)
lib64gcc-8-dev-x32-cross - GCC support library (64bit development files)
libdcmtk-dev - OFFIS DICOM toolkit development libraries and headers
libdcmtk14 - OFFIS DICOM toolkit runtime libraries
libgcc-4.9-dev - GCC support library (development files)
libgcc-5-dev - GCC support library (development files)
libgcc-6-dev - GCC support library (development files)
libgcc-6-dev-amd64-cross - GCC support library (development files)
libgcc-6-dev-arm64-cross - GCC support library (development files)
libgcc-6-dev-armel-cross - GCC support library (development files)
libgcc-6-dev-armhf-cross - GCC support library (development files)
libgcc-6-dev-i386-cross - GCC support library (development files)
libgcc-6-dev-mips-cross - GCC support library (development files)
libgcc-6-dev-mips64el-cross - GCC support library (development files)
libgcc-6-dev-mipsel-cross - GCC support library (development files)
libgcc-6-dev-ppc64el-cross - GCC support library (development files)
libgcc-6-dev-s390x-cross - GCC support library (development files)
libgcc-7-dev - GCC support library (development files)
libgcc-8-dev - GCC support library (development files)
libgcc-8-dev-alpha-cross - GCC support library (development files)
libgcc-8-dev-amd64-cross - GCC support library (development files)
libgcc-8-dev-arm64-cross - GCC support library (development files)
libgcc-8-dev-armel-cross - GCC support library (development files)
libgcc-8-dev-armhf-cross - GCC support library (development files)
libgcc-8-dev-hppa-cross - GCC support library (development files)
libgcc-8-dev-i386-cross - GCC support library (development files)
libgcc-8-dev-m68k-cross - GCC support library (development files)
libgcc-8-dev-mips-cross - GCC support library (development files)
libgcc-8-dev-mips64-cross - GCC support library (development files)
libgcc-8-dev-mips64el-cross - GCC support library (development files)
libgcc-8-dev-mips64r6-cross - GCC support library (development files)
libgcc-8-dev-mips64r6el-cross - GCC support library (development files)
libgcc-8-dev-mipsel-cross - GCC support library (development files)
libgcc-8-dev-mipsr6-cross - GCC support library (development files)
libgcc-8-dev-mipsr6el-cross - GCC support library (development files)
libgcc-8-dev-powerpc-cross - GCC support library (development files)
libgcc-8-dev-powerpcspe-cross - GCC support library (development files)
libgcc-8-dev-ppc64-cross - GCC support library (development files)
libgcc-8-dev-ppc64el-cross - GCC support library (development files)
libgcc-8-dev-riscv64-cross - GCC support library (development files)
libgcc-8-dev-s390x-cross - GCC support library (development files)
libgcc-8-dev-sh4-cross - GCC support library (development files)
libgcc-8-dev-sparc64-cross - GCC support library (development files)
libgcc-8-dev-x32-cross - GCC support library (development files)
libn32gcc-6-dev-mips-cross - GCC support library (n32 development files)
libn32gcc-6-dev-mips64el-cross - GCC support library (n32 development files)
libn32gcc-6-dev-mipsel-cross - GCC support library (n32 development files)
libn32gcc-8-dev-mips-cross - GCC support library (n32 development files)
libn32gcc-8-dev-mips64-cross - GCC support library (n32 development files)
libn32gcc-8-dev-mips64el-cross - GCC support library (n32 development files)
libn32gcc-8-dev-mips64r6-cross - GCC support library (n32 development files)
libn32gcc-8-dev-mips64r6el-cross - GCC support library (n32 development files)
libn32gcc-8-dev-mipsel-cross - GCC support library (n32 development files)
libn32gcc-8-dev-mipsr6-cross - GCC support library (n32 development files)
libn32gcc-8-dev-mipsr6el-cross - GCC support library (n32 development files)
libnet-ssh2-perl - Perl module for the SSH 2 protocol
librust-libgit2-sys+libssh2-sys-dev - Native bindings to the libgit2 library - feature "libssh2-sys"
librust-libssh2-sys-dev - Native bindings to the libssh2 library - Rust source code
libss2 - command-line interface parsing library
libss7-2.0 - Signalling System 7 (ss7) library
libss7-dev - Signalling System 7 (ss7) development files
libsscm-dev - Development library for sigscheme Scheme interpreter
libsscm3 - Shared library for sigscheme Scheme interpreter
libssh-4 - tiny C SSH library (OpenSSL flavor)
libssh-dev - tiny C SSH library - Development files (OpenSSL flavor)
libssh-doc - tiny C SSH library - Documentation files
libssh-gcrypt-4 - tiny C SSH library (gcrypt flavor)
libssh-gcrypt-dev - tiny C SSH library - Development files (gcrypt flavor)
libssh2-1 - SSH2 client-side library
libssh2-1-dev - SSH2 client-side library (development headers)
libssl-dev - Secure Sockets Layer toolkit - development files
libssl-doc - Secure Sockets Layer toolkit - development documentation
libssl-ocaml - OCaml bindings for OpenSSL (runtime)
libssl-ocaml-dev - OCaml bindings for OpenSSL
libssl-utils-clojure - library for SSL certificate management on the JVM
libssl1.0-dev - Secure Sockets Layer toolkit - development files
libssl1.0.2 - Secure Sockets Layer toolkit - shared libraries
libssl1.1 - Secure Sockets Layer toolkit - shared libraries
libssm-bin - macromolecular superposition library - binaries
libssm-dev - macromolecular superposition library - development files
libssm2 - macromolecular superposition library - runtime
libsss-certmap-dev - Certificate mapping library for SSSD -- development files
libsss-certmap0 - Certificate mapping library for SSSD
libsss-idmap-dev - ID mapping library for SSSD -- development files
libsss-idmap0 - ID mapping library for SSSD
libsss-nss-idmap-dev - SID based lookups library for SSSD -- development files
libsss-nss-idmap0 - SID based lookups library for SSSD
libsss-simpleifp-dev - SSSD D-Bus responder helper library -- development files
libsss-simpleifp0 - SSSD D-Bus responder helper library
libsss-sudo - Communicator library for sudo
libx32gcc-6-dev-amd64-cross - GCC support library (x32 development files)
libx32gcc-6-dev-i386-cross - GCC support library (x32 development files)
libx32gcc-8-dev-amd64-cross - GCC support library (x32 development files)
libx32gcc-8-dev-i386-cross - GCC support library (x32 development files)
perl-openssl-defaults - version compatibility baseline for Perl OpenSSL packages
php-ssh2 - Bindings for the libssh2 library
python-libssh2 - Python binding for libssh2 library
python-libsss-nss-idmap - Python bindings for the SID lookups library
python3-libsss-nss-idmap - Python3 bindings for the SID lookups library
r-cran-openssl - GNU R toolkit for encryption, signatures and certificates based on OpenSSL
ssh-audit - tool for ssh server auditing
tcode - create a Java file from an associated LaTex file
@raspberrypi:~ $ sudo apt-get update
@raspberrypi:~ $ sudo apt-get install php-ssh2
@raspberrypi:~ $ sudo service apache2 restart

Raspberry Pi 4概要

SoC(システムオンチップ)の変更。Cortex-A72アーキテクチャ(64ビットのクアッドコアARMv8が1.5GHz)を採用。

  • H.265のハードウェアビデオデコーディング
  • 基本モデルは1GBのRAM、2GBと4GBのRAMを搭載するモデルをラインナップ
  • メモリ規格がLPDDR2からLPDDR4に更新
  • Gigabit Ethernet搭載(Gigabit Ethernet over USB 2.0からの変更)
  • USB 3.0×2とUSB 2.0×2
  • 電源用USB-Cポート装備
  • Bluetoothも、4.2から5.0にアップデート
  • 2つのmicro-HDMIポート(フルサイズのHDMIポートからの変更)
  • 2つの4Kディスプレイを、60fpsで接続可能

Raspberry Piの正規販売店によって米国時間6月23日に発売された。メモリが1GBのベースモデルの価格は35ドル。RAMが2GBのモデルは45ドル、4GBのモデルは55ドル。

Raspberry Pi 4 BとRaspberry Pi 3 B +比較

海外サイトで見つけたベンチマーク結果です。
個人的に気にしていた消費電力ですが、想定以上の優秀な結果。導入しても良いかなと思える結果です。

テスト項目Raspberry Pi 3 B +Raspberry Pi 4 B差分
起動時間39.941.74.51%
アイドル状態(消費電力)0.5050.68435.45%
ピーク状態(消費電力)1.141.12-1.75%
CPUベンチマーク(1スレッド)317.7250.4-21.18%
CPUベンチマーク(4スレッド)86.262.8-27.15%
RAMベンチマーク14202983110.07%
OpenGL30.935.815.86%
Ethernet332933181.02%
WiFi 2.4Ghz38.639.62.59%
WiFi 5Ghz98.61078.52%
USB Drive Write35155342.86%
USB Drive Read32233628.13%

大幅な入出力の増強。発熱は少し気になるものの、魅力ある製品だと思います。
また、イノベーションと呼べるモデルチェンジだと思います。

API連携プラットフォーム概要(Overview)

ラズベリーパイ(Raspberry Pi)とNAS(Synology)の使い分け

記載済み記事

ネットワーク構成

SynologyのWEBサーバとRaspberry PiのWEB APIを外部公開にする必要があります。
SynologyとRaspberry Piの両方をWEBサーバーとして、外部公開します。
通常WEBサービスでは、ポート80(http://)と443(https://)が利用されます。
家庭向けの製品では、パケットの到着ポートで、アクセスURLを見て、パケット送付先を振り分けることは出来ないので、2台のWEBサーバを公開する際は、1台を別ポートで運用します。

NAT / Port Forward / Virtual Server設定

インターネット側IP+Port を ローカルネット側IP+Port の転送ルールを設定します。この技術や機能名がNAT、Port ForwardやVirtual Serverと呼ばれております。

パブリック側プライベート側
(グローバルIP)Port:80(Synology プライベートIP)Port:80
(グローバルIP)Port:443(Synology プライベートIP)Port:443
(グローバルIP)Port:8443(Raspberry PiプライベートIP)Port:443

この際に、グローバル側からのRaspberry Piへのアクセス方法は、「https://www.miki.-ie.com:8443」とポート番号を指定したアドレスとなります。

複数DOMAIN(ドメイン)の運用

複数の独自ドメインでWEBサーバを運用します。これは、WEBサーバのVirtual Server機能で実現します。Synologyでは、簡単に設定が可能ですので、設定方法などは割愛します。

常時電源が入っているマシンが2台。
1台がベストなのですが、現時点のベストプラクティスは2台構成
・Synology DiskStation DS218j:サーバー機能、NAS機能、バックアップスペース など
・Raspberry Pi 3 modelB +:各種プログラム動作環境

SynologyとRaspberry Pi

CPUの性能など詳細な比較は、別のサイトを参考にして下さい。
私の現時点(2019年7月時点)の答えは、両方導入。

Synology DiskStation DS218j

Raspberry Pi 3 modelB +

HDDはRAID化によりデータ保全性や製品の特性上高信頼な24時間運転が期待できます。
SSHなどでコンソールログインできるものの、自由度は低いです。
また、GUIで提供されている機能の完成度が高いので、個別なカスタマイズなしで運用な範囲をすべてSynologyで運用が基本方針です。
やはり製品寿命が気になります。
ただし自由度が高い。
新規技術が容易。
(コードさえかければ、今世の中にあるオープンソフトはほとんど動くのでは?)よって、日次バックアップで復旧可能な範囲でのデータ格納。
  • パブリック公開
  • WEBサーバー
  • DBサーバー
  • Node.js関係の開発スピードが速いプラットフォーム
  • OSコマンド

SynologyとRaspberry Piの利用方針

「カスタマイズなしで運用できるものはSynology、Synologyで運用出来ないものをRaspberry Pi」

前提条件

「google-home-notifier」利用に向けて、Raspberry PiへNode.jsとnpmをインストールします。 参考ページ

@raspberrypi:~/google-home-notifier $ node -v
v10.16.0
@raspberrypi:~/google-home-notifier $ node npm -v
6.9.0

参考にさせていただいたページです。

GoogleHomeスピーカーに外部からプッシュして自発的に話してもらいます
Google Home に任意のテキストを喋らせる
GitHub-google-home-notifier
google-home-notifierで"Error: get key failed from google"とエラーが出る問題の対処法

google-home-notifierインストール

@raspberrypi $ curl -sL https://deb.nodesource.com/setup_7.x | sudo -E bash -
@raspberrypi$ sudo apt-get install nodejs
@raspberrypi $ sudo apt-get install git-core libnss-mdns libavahi-compat-libdnssd-dev
@raspberrypi$ git clone https://github.com/noelportugal/google-home-notifier
@raspberrypi $ cd google-home-notifier/
@raspberrypi $ npm install

GoogleTTSの仕様変更対応

GoogleTTSの新バージョンがリリースされており、このままでは、うまく動作しません。仕様変更により、今まで利用していたユーザーも利用できなくなり、関連する記事がWEBに複数出ておりました。
Error: get key failed from google
at /home/user/google-home-notifier/node_modules/google-tts-api/lib/key.js:23:23
at process._tickCallback (internal/process/next_tick.js:68:7)

package.jsonのバージョン情報を変更。(0.0.2から0.0.4に変更)

"keywords": [
"google home",
"notifications",
"notifier"
],
"license": "MIT",
"dependencies": {
"body-parser": "^1.15.2",
"castv2-client": "^1.1.2",
"express": "^4.14.0",
"google-tts-api": "0.0.4",// ここを0.0.4に書き換える
"mdns": "^2.3.3",
"ngrok": "^2.2.4"
},

pakage.jason変更後に、google-tts-apiのアップデートを実施。

@raspberrypi:~/google-home-notifier $ npm update google-tts-api

Webhook(WEBリクエスト)形式での運用準備

google-home-notifierフォルダにあるexample.jsを流用して、以下の形式でのリクエストによりGoogleホームより音声出力を実現します。以下のコマンドで、WEBアクセスの待ち状態となります。

node.js example.js

Endpoints:
http://192.168.xxx.xxx:9081/google-home-notifier
GET example:
curl -X GET http://192.168.xxx.xxx:9081/google-home-notifier?text=Hello+Google+Home
POST example:
curl -X POST -d "text=Hello Google Home" http://192.168.xxx.xxx:9081/google-home-notifier

起動時に以下のWARNINGが出るのですが、ほかの方もWARNINGが出たまま運用しているようです。(WARNINGを消す情報は見つけられませんでした)

*** WARNING *** The program 'node' uses the Apple Bonjour compatibility layer of Avahi.
*** WARNING *** Please fix your application to use the native API of Avahi!
*** WARNING *** For more information see <http://0pointer.de/blog/projects/avahi-compat.html>
*** WARNING *** The program 'node' called 'DNSServiceRegister()' which is not supported (or only supported partially) in the Apple Bonjour compatibility layer of Avahi.
*** WARNING *** Please fix your application to use the native API of Avahi!
*** WARNING *** For more information see <http://0pointer.de/blog/projects/avahi-compat.html>Endpoints:

それでは設定です。google-home-notifierフォルダにあるexample.jsの言語設定を2か所変更します。

var language = 'ja'; // default language code

後は、Google HomeのIPアドレスと、WEBアクセスを受けるポートをexample.jsに設定します。

今回は3台分のGoogle Home Miniを運用したいので、example.jsを3個コピーして、3個のスクリプトを起動する方式にしました。

  • Google-Home-1:192.168.xxx.81:ポート番号9081
    http://192.168.xxx.xxx:9081/google-home-notifier?text=Hello+Google+Home
  • Google-Home-2:192.168.xxx.82:ポート番号9082
    http://192.168.xxx.xxx:9082/google-home-notifier?text=Hello+Google+Home
  • Google-Home3:192.168.xxx.83:ポート番号9083
    http://192.168.xxx.xxx:9083/google-home-notifier?text=Hello+Google+Home

forever導入による常時起動化とサーバー再起動時の自動起動

【Node.js入門】foreverの使い方とデーモン化による永続化・自動起動まとめ!
Node.js製のアプリをforeverで永続化する

foreverモジュールの導入方法

@raspberrypi:~/google-home-notifier $ sudo npm install -g forever

起動時のコマンドは、以下となります。

/usr/local/bin/forever start /home/user/google-home-notifier/google-home-1.js

再起動時にスクリプトが自動起動するようにクーロン登録します。

@raspberrypi:~/google-home-notifier $ crontab -e

以下を登録します。

@reboot /usr/local/bin/forever start /home/user/google-home-notifier/google-home-1.js
@reboot /usr/local/bin/forever start /home/user/google-home-notifier/google-home-2.js
@reboot /usr/local/bin/forever start /home/user/google-home-notifier/google-home-3.js

以上、上手く行ったら良いですね。
時間があれば、HOYAのVoiceText Web APIを利用する方法へ変更する予定です。

【うまく動作しなかった際に、実行したコマンドです】

@raspberrypi:~ $ sudo npm install -g npm
@raspberrypi:~/google-home-notifier $ npm update

「google-home-notifier」利用に向けて、Raspberry PiへNode.jsとnpmをインストールします。

利用環境

  • NOOBS:Offline and network install、Version:3.1.1、Release date:2019-06-24
  • Raspberry Pi 3 Model B+:1.4GHz 64-bit quad-core processor

インストール

@raspberrypi $ npm -v
-bash: npm: コマンドが見つかりません
@raspberrypi $ sudo apt-get update
@raspberrypi $ sudo apt-get install -y nodejs npm
@raspberrypi $ sudo npm cache clean
@raspberrypi $ sudo n stable
@raspberrypi $ sudo npm install npm n -g
@raspberrypi $ npm -v6.9.0

Google Home Notifier導入準備完了

「google-home-notifier」利用に向けて、Raspberry PiへNode.jsとnpmをインストールが完了しました。